

MVVMパターンで画面遷移する方法を知りたい。。。
この記事では、WPF で MVVM パターンを使って画面を遷移する方法を紹介します。MVVMパターンで設計することで アプリケーションのロジックとUIを分離し、テスタビリティや保守性を向上させることができます。

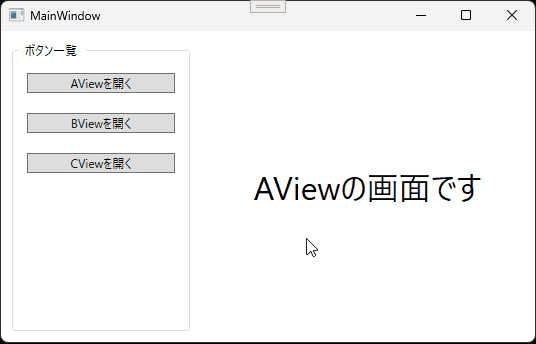
まずは、ここで紹介する方法で作成したアプリケーションの動作を見てみましょう。次のように、マウスカーソルで選択したボタンに応じて画面が切り替わります。
MVVM パターンによる画面遷移のやり方について知りたいという方はぜひ参考にしてみて下さい。

オススメの参考書
C#の使い方が丁寧に解説しており、「基礎からしっかりと学びたい」という初心者の方にオススメの一冊です。サンプルコードも記載してあり、各章の最後に復習問題があるので理解度を確認しながら読み進めることができます。新しい C# のバージョンにも対応している書籍です。

画面遷移の方法

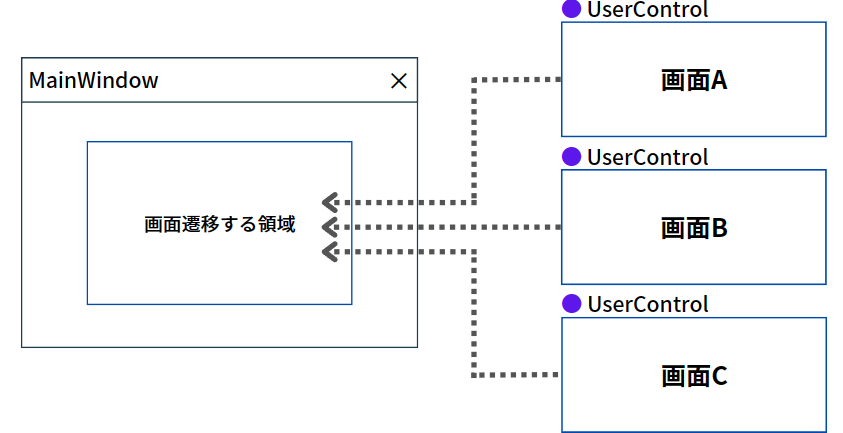
今回ここで紹介する画面遷移は、MainWindow.xaml の特定の領域を切り替えて表示する方法です。
具体的には、画面遷移で表示する画面を UserControl で作成し、特定の領域内に UserControl をセットして、条件によって UserControl を入れ替えて表示するというものになります。
画面遷移をよく使うシーンとしてボタンをクリックしたら、そのクリックしたボタンによって画面を切り替える場合が挙げられます。

他にも1つのボタンをクリックすると「画面A」→「画面B」→「画面C」のように順番に画面遷移するシーンが挙げられます。
ここでは、クリックしたボタンに応じて、そのボタンとリンクしている画面へ切り替えるアプリケーションを紹介します。
ContentControlで画面遷移する

WPF は MVVM パターンによる開発が推奨されているので、このパターンを採用したソースコードを紹介したいと思います。
まずは、プロジェクトにフォルダとクラス、ユーザーコントロールを下図のように追加します。ソリューションエクスプローラーを開いて、プロジェクト名を選択後に右クリックして、右クリックメニューの中から[追加]を選ぶとフォルダとクラス、ユーザーコントロールを追加することができます。

簡単にプロジェクトの階層について説明します。
Command フォルダにはICommandを継承したDelegateCommandクラスを追加しています。このクラスについては、次の記事で紹介していますので、ここでは省略します。

ViewModels にはINotifyPropertyChangedを継承したViewModelBaseクラスを追加しています。更に各 View のViewModelクラスを作成し、ViewModelBaseを継承させています。
Views には 画面遷移する UI 画面の UserControl(WPF) を追加しています。
ViewModelの作成
まずはViewModelBaseクラスを作成します。このクラスはINotifyPropertyChangedインターフェイスを継承する抽象クラスにします。
INotifyPropertyChanged を実装するためのイベントハンドラと実行メソッドを記述します。
using System.ComponentModel;
using System.Runtime.CompilerServices;

namespace Sample.ViewModels
{
    public class ViewModelBase : INotifyPropertyChanged
    {
        // INotifyPropertyChanged を実装するためのイベントハンドラ
        public event PropertyChangedEventHandler PropertyChanged;

        // プロパティ名によって自動的にセットされる
        public void OnPropertyChanged([CallerMemberName] string propertyName = null) =>
            PropertyChanged?.Invoke(this, new PropertyChangedEventArgs(propertyName));
    }
}
AViewModel.cs と BViewModel.cs と CViewModel.cs はViewModelBaseを継承し、コンストラクタを用意します。
3つのクラスは次のように記述します。
AViewModelのクラス
namespace Sample.ViewModels
{
    public class AViewModel : ViewModelBase
    {
        public AViewModel() { }
    }
}
BViewModelのクラス
namespace Sample.ViewModels
{
    class BViewModel: ViewModelBase
    {
        public BViewModel() { }
    }
}
CViewModelのクラス
namespace Sample.ViewModels
{
    class CViewModel : ViewModelBase
    {
        public CViewModel() { }
    }
}
続いて、MainWindowViewModel.cs にViewModelBaseを継承して、画面に表示する UserControl の ViewModel を設定するActiveViewプロパティを用意します。
また、MainWindow のボタンをクリックした時に実行されるコマンドを用意します。このコマンドの実行メソッドではコマンドのパラメーターによって、ActiveViewプロパティにセットする ViewModel を切り替えます。
MainWindowViewModel.cs は次のように記述します。
using Sample.Command;

namespace Sample.ViewModels
{
    public class MainWindowViewModel : ViewModelBase
    {
        private ViewModelBase activeView = new AViewModel();

        //画面に表示するUserControlのViewModelを設定するプロパティ
        public ViewModelBase ActiveView
        {
            get { return activeView; }
            set
            {
                if (activeView != value)
                {
                    activeView = value;
                    OnPropertyChanged("ActiveView");
                }
            }
        }

        //ボタンのコマンドプロパティ
        public DelegateCommand<string> ScreenTransitionCommand { get; }

        //コンストラクタ
        public MainWindowViewModel()
        {
            ScreenTransitionCommand = new DelegateCommand<string>(screenTransitionExcute);
        }

        //ボタンのコマンド実行メソッド
        private void screenTransitionExcute(string param)
        {
            //コマンドのパラメーターによって
            //ActiveViewにセットするViewModelを切り替える

            switch (param)
            {
                case "AView":
                    ActiveView = new AViewModel();
                    break;
                case "BView":
                    ActiveView = new BViewModel();
                    break;
                case "CView":
                    ActiveView = new CViewModel();
                    break;
            }
        }
    }
}
Viewの作成
画面遷移する UserControl(WPF) を設定します。
AView.xaml と BView.xaml と CView.xaml には Label の Content にユーザーコントロールの名前を記述して、画面が切り替わっていることが分かるようにします。
3つのユーザーコントロールの XAML は次のように記述します。
AViewのXAML
<UserControl
    x:Class="Sample.Views.AView"
    xmlns="http://schemas.microsoft.com/winfx/2006/xaml/presentation"
    xmlns:x="http://schemas.microsoft.com/winfx/2006/xaml"
    xmlns:d="http://schemas.microsoft.com/expression/blend/2008"
    xmlns:local="clr-namespace:Sample.Views"
    xmlns:mc="http://schemas.openxmlformats.org/markup-compatibility/2006"
    d:DesignHeight="450"
    d:DesignWidth="800"
    mc:Ignorable="d">
    <Label
        HorizontalContentAlignment="Center"
        VerticalContentAlignment="Center"
        Content="AViewの画面です"
        FontSize="32" />
</UserControl>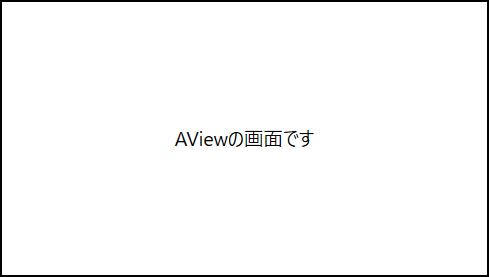
BViewのXAML
<UserControl
    x:Class="Sample.Views.BView"
    xmlns="http://schemas.microsoft.com/winfx/2006/xaml/presentation"
    xmlns:x="http://schemas.microsoft.com/winfx/2006/xaml"
    xmlns:d="http://schemas.microsoft.com/expression/blend/2008"
    xmlns:local="clr-namespace:Sample.Views"
    xmlns:mc="http://schemas.openxmlformats.org/markup-compatibility/2006"
    d:DesignHeight="450"
    d:DesignWidth="800"
    mc:Ignorable="d">
    <Label
        HorizontalContentAlignment="Center"
        VerticalContentAlignment="Center"
        Content="BViewの画面です"
        FontSize="32" />
</UserControl>
CViewのXAML
<UserControl x:Class="Sample.Views.CView"
    xmlns="http://schemas.microsoft.com/winfx/2006/xaml/presentation"
    xmlns:x="http://schemas.microsoft.com/winfx/2006/xaml"
    xmlns:mc="http://schemas.openxmlformats.org/markup-compatibility/2006"
    xmlns:d="http://schemas.microsoft.com/expression/blend/2008"
    xmlns:local="clr-namespace:Sample.Views"
    mc:Ignorable="d"
    d:DesignHeight="450" d:DesignWidth="800">
    <Label
        HorizontalContentAlignment="Center"
        VerticalContentAlignment="Center"
        Content="CViewの画面です"
        FontSize="32" />
</UserControl>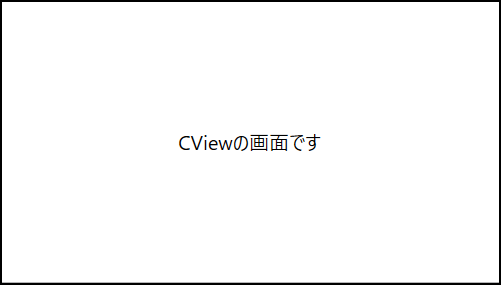
MainWindow.xaml では、ContentControl のContentに MainWindowViewModel のActiveViewをバインドします。
Grid のリソース内でDataTemplateを使って、DataTypeにViewModelを指定し、それに紐づく View を指定して関連付けをします。
これにより、ActiveViewにセットされた ViewModel に関連付けされた View が表示されるわけです。
画面を切り替える為のボタンを3つ用意し、MainWindowViewModel のScreenTransitionCommandをボタンのコマンドにバインドします。更にCommandParameterにパラメーターを設定します。
MainWindow.xaml は次のように記述します。
<Window
    x:Class="Sample.MainWindow"
    xmlns="http://schemas.microsoft.com/winfx/2006/xaml/presentation"
    xmlns:x="http://schemas.microsoft.com/winfx/2006/xaml"
    xmlns:d="http://schemas.microsoft.com/expression/blend/2008"
    xmlns:mc="http://schemas.openxmlformats.org/markup-compatibility/2006"
    xmlns:view="clr-namespace:Sample.Views"
    xmlns:vm="clr-namespace:Sample.ViewModels"
    Title="MainWindow"
    Width="550"
    Height="350"
    mc:Ignorable="d">
    <Window.DataContext>
        <vm:MainWindowViewModel/>
    </Window.DataContext>
    <Grid>
        <Grid.ColumnDefinitions>
            <ColumnDefinition Width="200"/>
            <ColumnDefinition Width="*"/>
        </Grid.ColumnDefinitions>
        <GroupBox Margin="10,5,10,10">
            <GroupBox.Header>
                <Label Content="ボタン一覧"/>
            </GroupBox.Header>
            <StackPanel Grid.Column="0">
                <Button Content="AViewを開く" Command="{Binding ScreenTransitionCommand}" CommandParameter="AView" Margin="10"/>
                <Button Content="BViewを開く" Command="{Binding ScreenTransitionCommand}" CommandParameter="BView" Margin="10"/>
                <Button Content="CViewを開く" Command="{Binding ScreenTransitionCommand}" CommandParameter="CView" Margin="10"/>
            </StackPanel>
        </GroupBox>
        <Grid Grid.Column="1">
            <Grid.Resources>
                <DataTemplate DataType="{x:Type vm:AViewModel}">
                    <view:AView />
                </DataTemplate>
                <DataTemplate DataType="{x:Type vm:BViewModel}">
                    <view:BView/>
                </DataTemplate>
                <DataTemplate DataType="{x:Type vm:CViewModel}">
                    <view:CView/>
                </DataTemplate>
            </Grid.Resources>
            <ContentControl Content="{Binding ActiveView}"/>
        </Grid>
    </Grid>
</Window>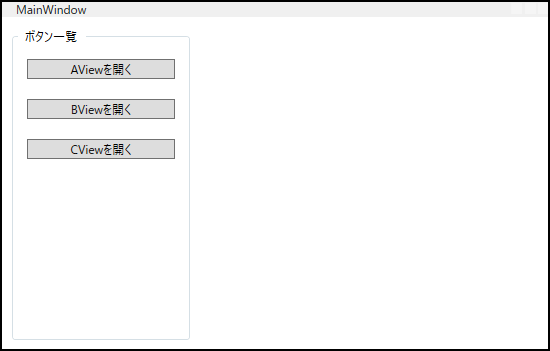
お疲れ様でした。これで完成です。
動作確認

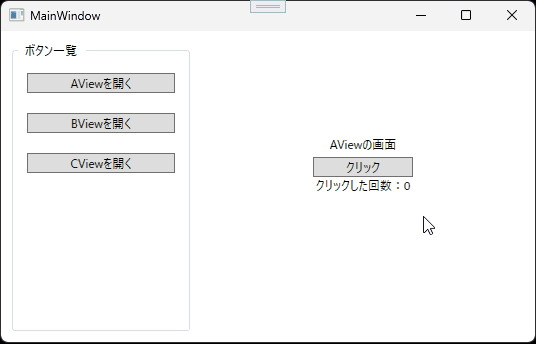
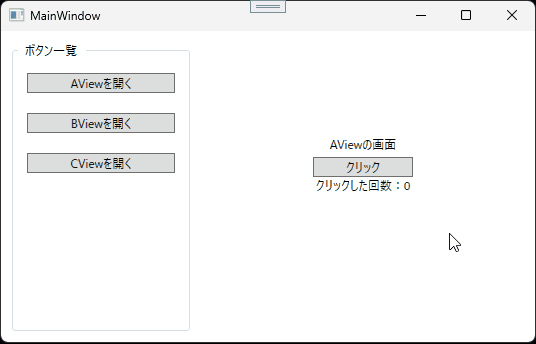
それではデバッグしてアプリを実行してみましょう。
最初に表示される画面は、AView 画面です。
左側にあるボタンをクリックすると、画面が切り替わります。
これで目標だった画面遷移が実現できました。
おまけ

AView にButtonとTextBlockを追加して、ボタンがクリックされた回数をテキストブロックに表示する処理を追加します。
AView の XAML を次のように変更します。
<UserControl
    x:Class="Sample.Views.AView"
    xmlns="http://schemas.microsoft.com/winfx/2006/xaml/presentation"
    xmlns:x="http://schemas.microsoft.com/winfx/2006/xaml"
    xmlns:d="http://schemas.microsoft.com/expression/blend/2008"
    xmlns:local="clr-namespace:Sample.Views"
    xmlns:mc="http://schemas.openxmlformats.org/markup-compatibility/2006"
    d:DesignHeight="450"
    d:DesignWidth="800"
    Background="#fff"
    mc:Ignorable="d">
    <StackPanel Margin="10,100,20,0" Orientation="Vertical">
        <Label HorizontalContentAlignment="Center" Content="AViewの画面" />
        <Button
            Width="100"
            Command="{Binding CountCommand}"
            Content="クリック" />
        <TextBlock Text="{Binding ClickCount, StringFormat=クリックした回数:{0}}" TextAlignment="Center" />
    </StackPanel>
</UserControl>
AView の ViewModel にはクリックした回数を保持するClickCountプロパティを用意して、ボタンのコマンドに CountCommandをバインドします。コマンドの実行メソッドにはClickCountをインクリメントする処理を記述します。
AViewModel.cs を次のように変更します。
using ScreenTransition1.Command;

namespace Sample.ViewModels
{
    public class AViewModel : ViewModelBase
    {
        private int clickCount = 0;

        //クリックした回数を保持するプロパティ
        public int ClickCount
        {
            get { return clickCount; }
            set
            {
                if (clickCount != value)
                {
                    clickCount = value;
                    OnPropertyChanged("ClickCount");
                }
            }
        }

        //ボタンのコマンド
        public DelegateCommand CountCommand { get; }

        //コンストラクタ
        public AViewModel()
        {
            CountCommand = new DelegateCommand(CountExcute);
        }

        //コマンドの実行メソッド
        private void CountExcute()
        {
            ClickCount++;
        }
    }
}
さて、プログラムを実行してみましょう。
上図を見ると、AView でカウントアップした値が画面遷移するとリセットされています。リセットされる原因は、MainWindowViewModel の コマンドの実行メソッドで AViewModel を都度、インスタンス化してActiveViewに代入しているからです。そのため前回の状態が保持されずにリセットされてしまいます。
画面遷移しても値が保持されるように、MainWindowViewModel に ViewModel のインスタンスを格納するプロパティ(viewModelTable)を作って、コンストラクタで ViewModel のインスタンスをプロパティに追加します。あとは ActiveViewにプロパティに格納したインスタンスを代入すればOKです。
ViewModel のインスタンスはコンストラクタ以外では行わないようにします。
MainWindowViewModel.cs を次のように変更します。
using ScreenTransition1.Command;
using System.Collections.Generic;

namespace Sample.ViewModels
{
    public class MainWindowViewModel : ViewModelBase
    {
        private ViewModelBase activeView = null;

        //画面に表示するUserControlのViewModelを設定するプロパティ
        public ViewModelBase ActiveView
        {
            get { return activeView; }
            set
            {
                if (activeView != value)
                {
                    activeView = value;
                    OnPropertyChanged("ActiveView");
                }
            }
        }

        //ボタンのコマンドプロパティ
        public DelegateCommand<string> ScreenTransitionCommand { get; }

        // ViewModelのインスタンスを格納するプロパティ
        private Dictionary<string, ViewModelBase> viewModelTable { get; }

        //コンストラクタ
        public MainWindowViewModel()
        {
            ScreenTransitionCommand = new DelegateCommand<string>(screenTransitionExcute);

            //Dictionaryを使い、Keyはコマンドパラメーターの値を指定し、
            //ValueはViewModelのインスタンスを指定する
            viewModelTable = new Dictionary<string, ViewModelBase>
            {
                { "AView", new AViewModel() },
                { "BView", new BViewModel() },
                { "CView", new CViewModel() },
            };

            ActiveView = viewModelTable["AView"];
        }

        //ボタンのコマンド実行メソッド
        private void screenTransitionExcute(string param)
        {
            //コマンドのパラメーターによって
            //ActiveViewにセットするViewModelを切り替える
            ActiveView = viewModelTable[param];
        }
    }
}
プログラムを実行してみましょう。
これで別の画面に切り替えても前回の状態が保持されるようになりました。


以上、最後まで読んで頂きありがとうございました。