Model-View-ViewModel(MVVM)は、UI(表示部分)と UI 以外のコード(実処理部分)を分離するための UI アーキテクチャデザインパターンです。

MVVM パターンによる疎結合を実現するための仕組みとして、データバインディングとコマンドという機能があります。WPF ではこれらの機能を使って MVVM パターンによる開発が推奨されています。
この記事では MVVM パターンの機能の1つであるコマンドの使い方について解説をしています。これから WPF でアプリ開発をする方にオススメの記事になっています。是非参考にしてみて下さい。
オススメの参考書
C#の使い方が丁寧に解説しており、「基礎からしっかりと学びたい」という初心者の方にオススメの一冊です。サンプルコードも記載してあり、各章の最後に復習問題があるので理解度を確認しながら読み進めることができます。新しい C# のバージョンにも対応している書籍です。

ICommandについて

WPF では何らかの操作に基いて処理を実行する場合、ICommand を実装したコマンドクラスのメソッドを呼び出す機能(コマンド)があります。
コマンドを使う例として、Button の Command プロパティに ICommand を実装したコマンドをバインドすることで、Button がクリックされた時に処理が実行されます。
このようにコマンドを使えば、クリックハンドラをコードビハインド側に記述しなくても済むようになります。これはコマンドの処理は別クラス(ViewModel)で行えるという事であり、View と View 以外のコードを分離する(疎結合)ことになります。コードを分離する事には多くの利点があり、「コードの単体テストがしやすい」や「保守メンテがしやすい」、「コードの可読性が向上する」などが挙げられます。
インターフェースの定義
ICommand は interface(インターフェース)です。このインターフェースに定義されている項目を確認してみます。
public interface ICommand
{
    //
    // 概要:
    //     コマンドを実行するかどうかに影響するような変更があった場合に発生します。
    event EventHandler CanExecuteChanged;

    //
    // 概要:
    //     現在の状態でコマンドが実行可能かどうかを決定するメソッドを定義します。
    //
    // パラメーター:
    //   parameter:
    //     コマンドにより使用されるデータです。 コマンドにデータを渡す必要がない場合は、このオブジェクトを null に設定できます。
    //
    // 戻り値:
    //     このコマンドを実行できる場合は、true。それ以外の場合は、false。
    bool CanExecute(object parameter);
    //
    // 概要:
    //     コマンドが起動される際に呼び出すメソッドを定義します。
    //
    // パラメーター:
    //   parameter:
    //     コマンドにより使用されるデータです。 コマンドにデータを渡す必要がない場合は、このオブジェクトを null に設定できます。
    void Execute(object parameter);
}
上記から分かるように3つの定義があります。1つはイベント、残り2つはメソッドです。
- CanExecuteChanged
コマンドが実行可能かどうかに変化があったことを通知するイベント - CanExecute
コマンドが実行可能かどうかを返すメソッド - Execute
コマンドの処理を実行するためのメソッド
コマンドの実行可否の状態をメソッドで返すことができ、その状態が変わった場合は、イベントで変更を通知できる仕組みになっています。
この仕組みがあることで、ある操作に対して ViewModel が実行可能な状態になっている時にコマンドが実行されるようになります。コマンドは UI オブジェクトと直結しているので、Button の IsEnabled プロパティを別途操作する必要はありません。例えば、TextBox に文字が入力されていたら Button を有効化するといった事がコマンドを使って実現することが可能になります。
ICommandで実装する

それでは、ICommand を継承したコマンドクラスを作りましょう。
クラスの名前には、RealyCommand とか DelegateCommand が使われることが多いです。MVVMフレームワークである Prism や Livet などでは DelegateCommand という名称で提供されています。ここではMVVMフレームワークは使用しませんが、クラスの名前は同じにします。
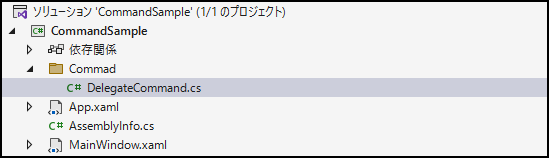
Visual Studio のソリューションエクスプローラーで右クリックして、[追加] -> [新しいフォルダ]の順に選択して「Command」というフォルダを作成します。先ほど作成した「Command」フォルダ上で右クリックして、[追加] -> [クラス]の順に選択して「DelegateCommand」というクラスを作成します。
作成したクラスにコマンドを実装します。ここでは様々なコマンドに対して共通のコマンドクラスが使えるように、コマンドの実行処理を Action として扱います。また、引数なしの Action 型のメソッドを実行するクラスと任意の型の引数を受け付ける Action 型のメソッドを実行するクラスを作ります。
using System;
using System.Windows.Input;

namespace CommandSample.Command
{
    /// <summary>
    /// 引数を受け付けない(引数なし)DelegateCommand
    /// </summary>
    public class DelegateCommand : ICommand
    {
        public event EventHandler CanExecuteChanged;

        private readonly Action action;
        private readonly Func<bool> canExecute;
        public DelegateCommand(Action action, Func<bool> canExecute = default)
        {
            this.action = action;
            this.canExecute = canExecute;
        }

        public bool CanExecute(object parameter)
        {
            return canExecute?.Invoke() ?? true;
        }

        public void Execute(object parameter)
        {
            action?.Invoke();
        }

        public void DelegateCanExecute()
        {
            CanExecuteChanged?.Invoke(this, EventArgs.Empty);
        }
    }


    /// <summary>
    /// 任意の型の引数を1つ受け付けるDelegateCommand
    /// </summary>
    /// <typeparam name="T"></typeparam>
    public class DelegateCommand<T> : ICommand
    {
        public event EventHandler CanExecuteChanged;

        private readonly Action<T> _action;
        private readonly Func<T, bool> _canExecute;
        public DelegateCommand(Action<T> action, Func<T, bool> canExecute = default)
        {
            _action = action;
            _canExecute = canExecute;
        }

        public bool CanExecute(object parameter)
        {
            return _canExecute?.Invoke((T)parameter) ?? true;
        }

        public void Execute(object parameter)
        {
            _action?.Invoke((T)parameter);
        }

        public void DelegateCanExecute()
        {
            CanExecuteChanged?.Invoke(this, EventArgs.Empty);
        }
    }
}
コマンドの使い方

それでは先ほど作成したコマンドクラスを使ってみましょう。
使用例1
Window に配置された Button をクリックすると、5秒間だけボタンが押せなくなるアプリを作ります。ボタンの処理中はボタンを押せなくしたい場面で使えるかもしれません。
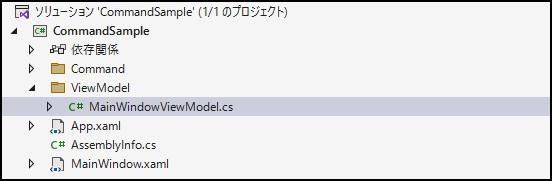
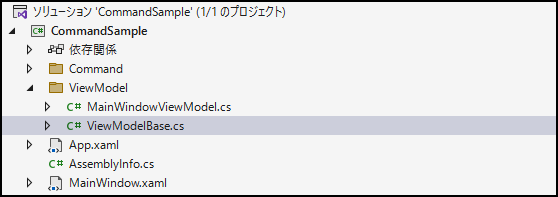
Visual Studio のソリューションエクスプローラーから「ViewModel」というフォルダを作成し、そのフォルダの中に「MainWindowViewModel」というクラスを作成します。
ViewModel(ビューモデル)
ここにコマンドにさせたい処理を実装します。DelegateCommand をプロパティとして公開して、MainWindowViewModel クラスのコンストラクタでインスタンス化しています。
第1引数はラムダ式で実行する処理の内容を記述しています。第2引数はコマンドが実行可能な状態かどうかを bool で戻り値として返しています。この引数を省略する事も可能ですが、省略した場合は常に実行可能な状態になります。
また、コマンドの実行可能な状態かどうかを保持する Flag プロパティを用意して、true なら実行可能で false なら実行不可能とします。実行可否の状態が変更されたら、通知されるように Flag プロパティの Setter で DelegateCanExecute メソッドを呼び出しています。
using CommandSample.Command;
using System.Threading.Tasks;

namespace CommandSample.ViewModel
{
    public class MainWindowViewModel
    {
        private bool flag = true;  // 初期値の設定(true:ボタンクリック可)
        public bool Flag
        {
            get { return flag; }
            set
            {
                flag = value;

                // コマンド実行可否の変更通知メソッド
                command.DelegateCanExecute();
            }
        }

        public DelegateCommand ButtonCommand { get; }

        public MainWindowViewModel()
        {
            // DelegateCommandのインスタンス化
            ButtonCommand = new DelegateCommand(async () =>
            {
                Flag = false;            // フラグの更新(false:ボタンクリック不可)
                await Task.Delay(5000);  // 5秒間待機
                Flag = true;             // フラグの更新(true:ボタンクリック可)
            }, canExcuteCommand);
        }

        private bool canExcuteCommand()
        {
            return Flag;
        }
    }
}
View(ビュー)
MainWindow.xaml にButton を配置します。Button の Command プロパティに MainWindowViewModel で定義した ButtonCommand をバインディングします。
また、Window の DataContext に MainWindowViewModel を指定します。
<Window
    x:Class="CommandSample.MainWindow"
    xmlns="http://schemas.microsoft.com/winfx/2006/xaml/presentation"
    xmlns:x="http://schemas.microsoft.com/winfx/2006/xaml"
    xmlns:d="http://schemas.microsoft.com/expression/blend/2008"
    xmlns:local="clr-namespace:CommandSample"
    xmlns:mc="http://schemas.openxmlformats.org/markup-compatibility/2006"
    xmlns:vm="clr-namespace:CommandSample.ViewModel"
    Title="MainWindow"
    Width="250"
    Height="200"
    mc:Ignorable="d">
    <Window.DataContext>
        <vm:MainWindowViewModel />
    </Window.DataContext>
    <Grid>
        <Button
            Margin="50"
            Command="{Binding ButtonCommand}"
            Content="クリック" />
    </Grid>
</Window>
Viewのコードビハインド
MainWindow.xaml.cs には何も記述していません。
using System.Windows;

namespace CommandSample
{
    /// <summary>
    /// Interaction logic for MainWindow.xaml
    /// </summary>
    public partial class MainWindow : Window
    {
        public MainWindow()
        {
            InitializeComponent();
        }
    }
}
ここまで記述したらデバッグしてみましょう。下図のようにボタンをクリックして、5秒間だけボタンがクリックできなくなれば成功です。
使用例2
Window に配置された TextBox に文字を入力すると、ボタンがクリックできるアプリを作ります。
先ほどの例と異なる点はボタンをクリックする前に、コマンドの実行可能な状態が変化する点です。
ViewModel(ビューモデル)
TextBox にバインディングする ShowText プロパティを用意します。プロパティの値が変更された場合に ShowCommand へ変更通知するために DelegateCanExecute メソッドを呼び出しています。
canExcute メソッドでは ShowText プロパティの値が null もしくは 空以外の場合にコマンドが実行できるようにしています。
using System.Windows;
using System.Threading.Tasks;
using System.Windows.Media.Animation;
using CommandSample.Command;
namespace CommandSample.ViewModel
{
    public class MainWindowViewModel
    {
        private string showText = "";
        public string ShowText
        {
            get { return showText; }
            set
            {
                showText = value;

                // コマンド実行可否の変更通知メソッド
                ShowCommand.DelegateCanExecute();
            }
        }

        public DelegateCommand ShowCommand { get; }

        public MainWindowViewModel()
        {
            // DelegateCommandのインスタンス化
            ShowCommand = new DelegateCommand(() => excute(), canExcute);
        }

        private void excute()
        {
            MessageBox.Show($"入力内容は\"{ShowText}\"です。");
        }

        private bool canExcute()
        {
            return !string.IsNullOrEmpty(ShowText);
        }
    }
}
View(ビュー)
MainWindow.xaml にTextBox と Button を配置します。TextBox は ShowTex をバインディングし、Button は ShowCommand をバインディングします。
TextBox に何かしら文字が入力されたらバインディングしているプロパティへ即座に通知したいので、UpdateSourceTrigger は PropertyChanged を指定します。
<Window
    x:Class="CommandSample.MainWindow"
    xmlns="http://schemas.microsoft.com/winfx/2006/xaml/presentation"
    xmlns:x="http://schemas.microsoft.com/winfx/2006/xaml"
    xmlns:d="http://schemas.microsoft.com/expression/blend/2008"
    xmlns:local="clr-namespace:CommandSample"
    xmlns:mc="http://schemas.openxmlformats.org/markup-compatibility/2006"
    xmlns:vm="clr-namespace:CommandSample.ViewModel"
    Title="MainWindow"
    Width="250"
    Height="200"
    mc:Ignorable="d">
    <Window.DataContext>
        <vm:MainWindowViewModel />
    </Window.DataContext>
    <StackPanel>
        <TextBox Margin="10,10,10,0" Text="{Binding ShowText, Mode=TwoWay, UpdateSourceTrigger=PropertyChanged}" />
        <Button
            Margin="10,10,10,0"
            Command="{Binding ShowCommand}"
            Content="クリック" />
    </StackPanel>
</Window>
Viewのコードビハインド
MainWindow.xaml.cs には何も記述していません。
using System.Windows;

namespace CommandSample
{
    /// <summary>
    /// Interaction logic for MainWindow.xaml
    /// </summary>
    public partial class MainWindow : Window
    {
        public MainWindow()
        {
            InitializeComponent();
        }
    }
}
ここまで記述したらデバッグしてみましょう。下図のように文字を入力してボタンをクリックしたら、メッセージボックスに入力した文字が表示されれば成功です。
使用例3
2つの TextBox に入力された数値を計算し、その結果を画面に表示するアプリを作ります。ラジオボタンのチェックによって足し算と引き算を切り替えるようにします。
これまでの使用例と異なる点はパラメーターを引数として渡す点です。クリックしたボタンによって処理を分岐させたい場合に使えます。
ViewModel(ビューモデル)
ViewModel で計算した結果を View に通知する必要があるため、INotifyPropertyChanged インターフェースを継承して、ViewModel の基底クラスを作ります。
Visual Studio のソリューションエクスプローラーにある「ViewModel」フォルダの中に「ViewModelBase」というクラスを作成します。
基底クラスには次のコードを記述します。
using System.ComponentModel;

namespace CommandSample.ViewModel
{
    public class ViewModelBase : INotifyPropertyChanged
    {
        public event PropertyChangedEventHandler PropertyChanged;

        public void OnPropertyChanged(string propertyName)
        {
            if (PropertyChanged != null)
            {
                PropertyChanged(this, new PropertyChangedEventArgs(propertyName));
            }
        }
    }
}
数値を入力する2つの TextBox にバインディングする FirstValue プロパティと SecondValue プロパティを用意します。更に計算結果を表示する TextBox にバインディングする ResultValue プロパティとラジオボタンのチェック項目応じて演算子を表示する TextBlock にバインディングする Operation プロパティを用意します。
コマンドは任意の型の引数を1つ受け付ける DelegateCommand<T> を使います。T はジェネリックと言われるもので、引数の型によって T には int 型や double 型になったりします。ここでは string 型の引数を受け付けるので DelegateCommand<string> としています。
using CommandSample.Command;

namespace CommandSample.ViewModel
{
    public class MainWindowViewModel : ViewModelBase
    {
        private double firstValue;
        private double secondValue;
        private double resultValue;
        private string operation = "+";
        private string operationGiven = "Add";
        public double FirstValue
        {
            get { return firstValue; }
            set
            {
                firstValue = value;
                PerformOperation(null);
            }
        }

        public double SecondValue
        {
            get { return secondValue; }
            set
            {
                secondValue = value;
                PerformOperation(null);
            }
        }

        public double ResultValue
        {
            get { return resultValue; }
            set
            {
                resultValue = value;
                OnPropertyChanged("ResultValue");
            }
        }

        public string Operation
        {
            get { return operation; }
            set
            {
                operation = value;
                OnPropertyChanged("Operation");
            }
        }

        public DelegateCommand<string> OperationCommand { get; }

        public MainWindowViewModel()
        {
            OperationCommand = new DelegateCommand<string>(x => PerformOperation(x));
        }

        private void PerformOperation(string param)
        {
            if (param != null) operationGiven = param;
            switch (operationGiven)
            {
                case "Add": Add(); break;
                case "Minus": Substract(); break;
            }
        }

        private void Add()
        {
            Operation = "+";
            ResultValue = firstValue + secondValue;
        }

        private void Substract()
        {
            Operation = "-";
            ResultValue = firstValue - secondValue;
        }
    }
}
View(ビュー)
ここで注目してほしいのは、RadioButton の CommandParameter 属性に引数として渡すパラメーターを指定しています。パラメーターには自身の Content を指定しているので、Content=”Add” の場合は parameter は “Add” になります。
<Window
    x:Class="CommandSample.MainWindow"
    xmlns="http://schemas.microsoft.com/winfx/2006/xaml/presentation"
    xmlns:x="http://schemas.microsoft.com/winfx/2006/xaml"
    xmlns:d="http://schemas.microsoft.com/expression/blend/2008"
    xmlns:local="clr-namespace:CommandSample"
    xmlns:mc="http://schemas.openxmlformats.org/markup-compatibility/2006"
    xmlns:vm="clr-namespace:CommandSample.ViewModel"
    Title="MainWindow"
    Width="250"
    Height="100"
    mc:Ignorable="d">
    <Window.DataContext>
        <vm:MainWindowViewModel />
    </Window.DataContext>
    <StackPanel>
        <Grid Margin="0,10,0,10">
            <Grid.ColumnDefinitions>
                <ColumnDefinition Width="*" />
                <ColumnDefinition Width="20" />
                <ColumnDefinition Width="*" />
                <ColumnDefinition Width="20" />
                <ColumnDefinition Width="*" />
            </Grid.ColumnDefinitions>
            <TextBox
                Grid.Column="0"
                Margin="10,0,10,0"
                Text="{Binding FirstValue, Mode=TwoWay, UpdateSourceTrigger=PropertyChanged}" />
            <TextBlock
                Grid.Column="1"
                Text="{Binding Operation}"
                TextAlignment="Center" />
            <TextBox
                Grid.Column="2"
                Margin="10,0,10,0"
                Text="{Binding SecondValue, Mode=TwoWay, UpdateSourceTrigger=PropertyChanged}" />
            <TextBlock
                Grid.Column="3"
                Text="="
                TextAlignment="Center" />
            <TextBlock
                Grid.Column="4"
                Margin="10,0,10,0"
                Text="{Binding ResultValue}" />
        </Grid>
        <StackPanel Orientation="Horizontal">
            <RadioButton
                Margin="10,0,0,0"
                Command="{Binding OperationCommand, UpdateSourceTrigger=PropertyChanged}" IsChecked="True"
                CommandParameter="{Binding Path=Content, RelativeSource={RelativeSource Self}}"
                Content="Add"
                GroupName="Group" />
            <RadioButton
                Margin="10,0,0,0"
                Command="{Binding OperationCommand, UpdateSourceTrigger=PropertyChanged}"
                CommandParameter="{Binding Path=Content, RelativeSource={RelativeSource Self}}"
                Content="Minus"
                GroupName="Group" />
        </StackPanel>
    </StackPanel>
</Window>
Viewのコードビハインド
MainWindow.xaml.cs には何も記述していません。
using System.Windows;

namespace CommandSample
{
    /// <summary>
    /// Interaction logic for MainWindow.xaml
    /// </summary>
    public partial class MainWindow : Window
    {
        public MainWindow()
        {
            InitializeComponent();
        }
    }
}
ここまで記述したらデバッグしてみましょう。下図のように TextBox に入力した数値の計算結果が表示されれば成功です。
まとめ

この記事ではコマンドの使い方について解説しました。ICommand を継承した DelegateCommand クラスを作成することで様々なコマンドに対して共通のコマンドが利用できるようになります。
WPF のコントロールによっては、デフォルトで Command プロパティが容易されていない場合があります。この場合は、Microsoftが提供する「Behaviors」ライブラリを使うことで解決します。このライブラリの使い方は以下の記事で紹介しています。

コマンドを使って、View と View 以外のコードを分離した MVVM パターンによるアプリ設計を行ってみましょう。


以上、最後まで読んで頂きありがとうございました。